
Setup domain for NextJs App with Vercel and NameCheap
6 minute read
This tutorial teach you how to setup custom domain for NextJs app with Vercel and NameCheap
Main table content:
- Buy domain in the Namecheap website
- Deploy NextJS app on the Vercel
- Add domain on the Vercel
- Setup custom domain into Namcheap
1. Buy domain on the NameCheap
NameCheap supplies very cheap domain, it is suitable for startup company.
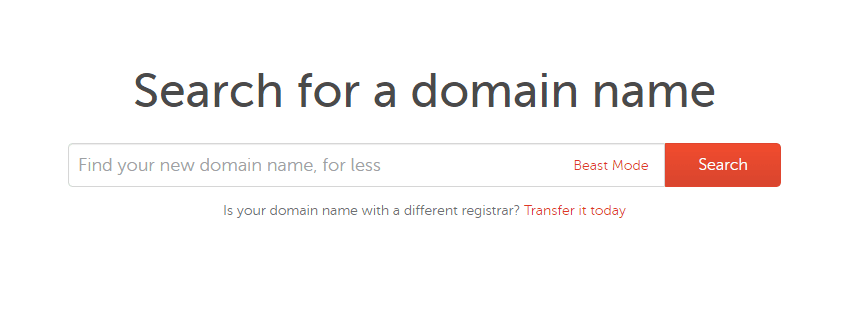
You can search the domain name which you want to name your web app.
2. Deploy NextJS App on Vercel
When you deploy your app on the Vercel server, the Vercel will supply for you one free domain with suffix .vercel.app, so your web site can be view globally.
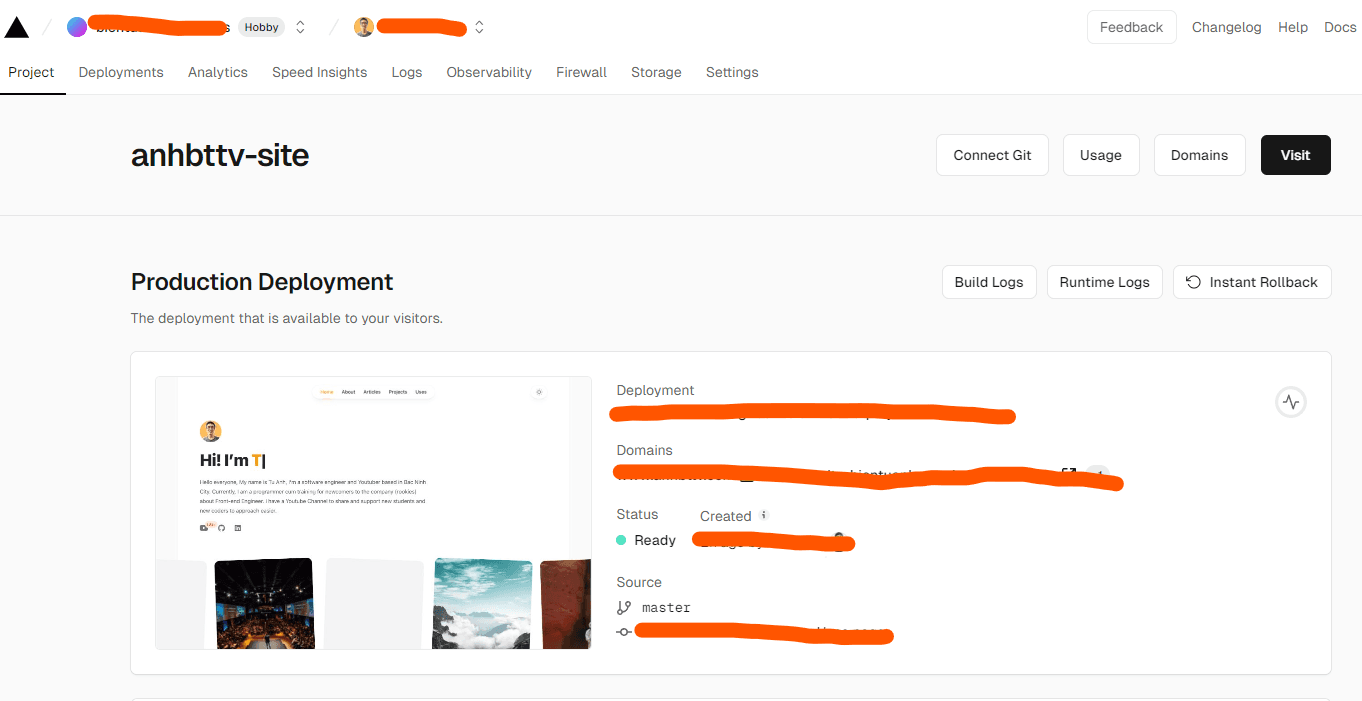
As you know, for production site, we need a custom domain for your brand. So we need add domain which we bought on the step 1, to the Vercel server, so let jump in step 3.
3. Setup domain on the Vercel
For custom domain for web app on the Vercel, we got to settings of your site, then click to domain on the left navigation.
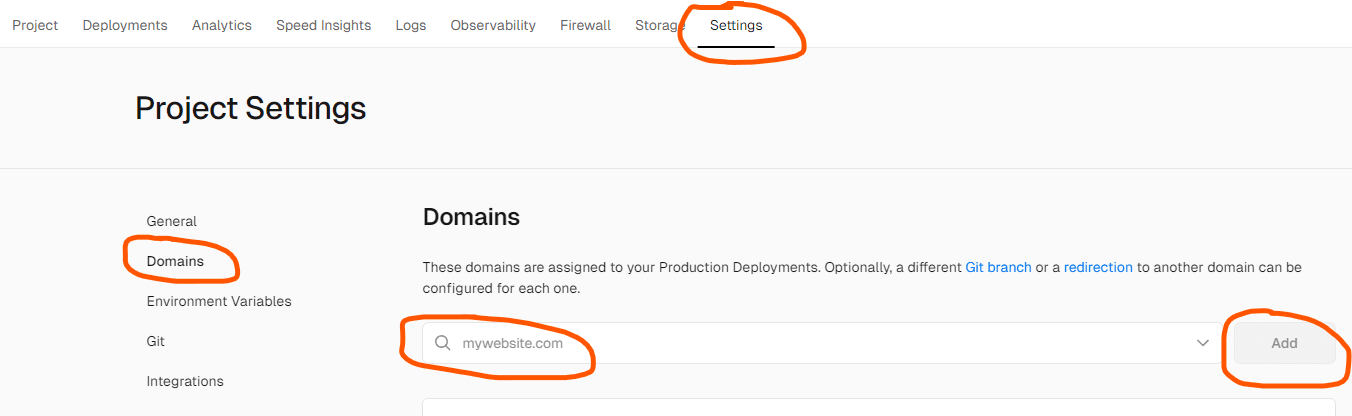
After that, we enter your domain (which bought on the step 1) to text box then click Add button.
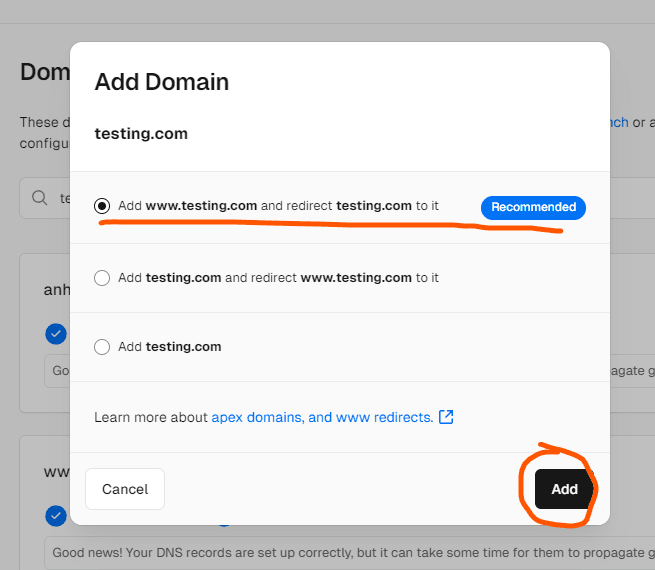
After click Add button on the modal, we will get config error on the domain info. This error is that we do not setup the domain on the NameCheap into the Vercel server. So go to step 4.
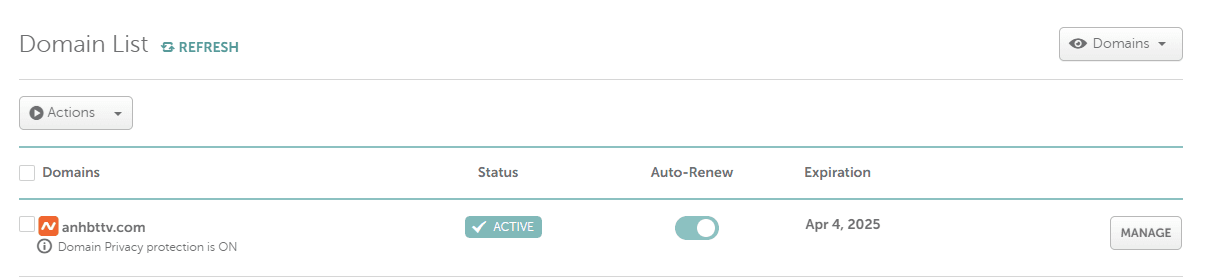
4. Setup custom domain into Namcheap
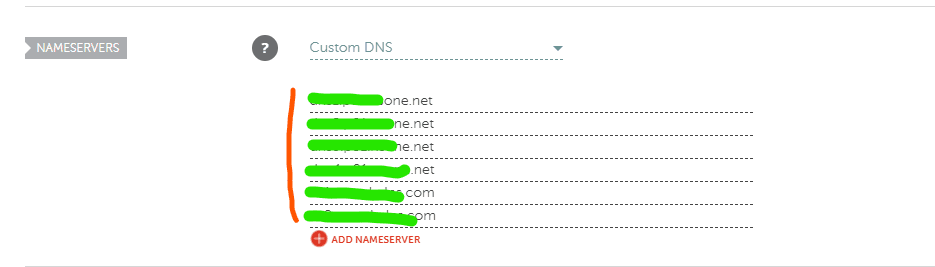
On the NameCheap, go to Dashboard -> Domain List -> Click Manage button

In the NameServers section, we enter the Vercel DNS into list. You can find the Vercel DNS in the error config message on the step 3.
After verify the new config, we will get success setup like the image below.
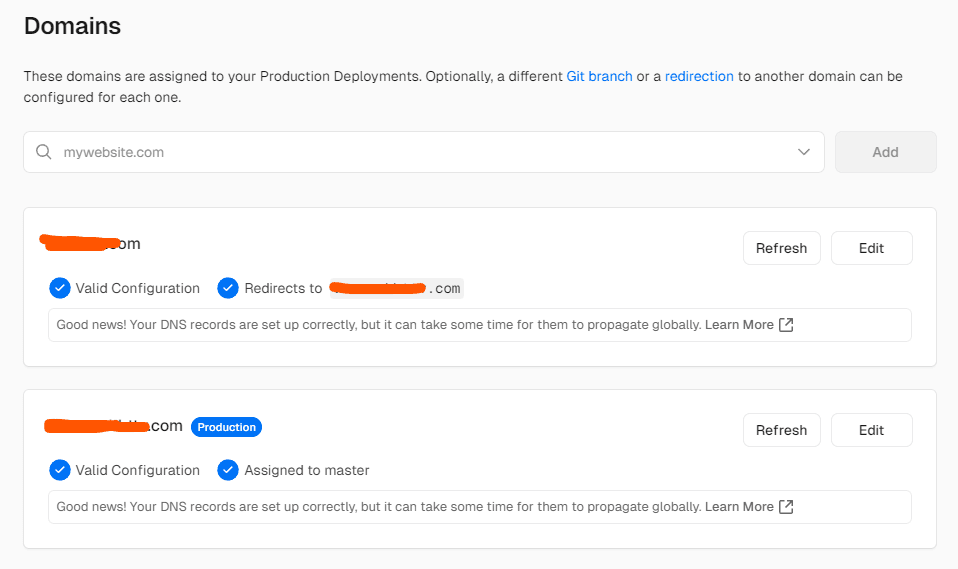
-> So we can view your site with custom domain which we bought on the Namecheap.